Manage your venues and their spaces
Find a venue's settings, create it, describe it and split it into spaces, whether you have one venue or several.
Aggiornato il
In Joinways, everything starts with the venue: its bookable spaces, its hours, its catalog, its quote terms and its BEO settings. The calendar, quotes, availability and reports all rely on it.
This article shows where a venue's settings live, whether you have one venue or several, then how to create a venue, describe it and split it into spaces.
What you'll learn
- Find a venue's settings with one venue or several.
- Create a venue and fill in its general information.
- Set up its spaces, combinations and booking mode.
- Know who can edit a venue and who can see it.
Prerequisites
- Be an "Owner" or "Admin" of the workspace to create a venue and edit its information, spaces, availability and quotes. A "Member" only opens "Items" and "BEO"; the "Operations" role only opens "BEO".
- The Pro plan or the trial to manage several venues: the Free plan is limited to 1 venue with 2 spaces.
1. Find a venue's settings
Where the settings live depends on how many venues your workspace has.
With a single venue
- In the sidebar, "My venue" opens your venue's page directly. The page holds the "Venue calendar" button and, for the day a second venue comes, "New venue".
- In "Settings", the "My venue" group lists the venue's sections flat: "Information", "Spaces", "Photos & Plans", "Availability", "Items", "Proposals & invoicing", "BEO" and "Calendars". The menu stays the same when you open a section.
- The currency and time zone are set in the venue's information and apply to the whole workspace. In "Settings" > "General", the "Open the venue information" link takes you there.
With several venues
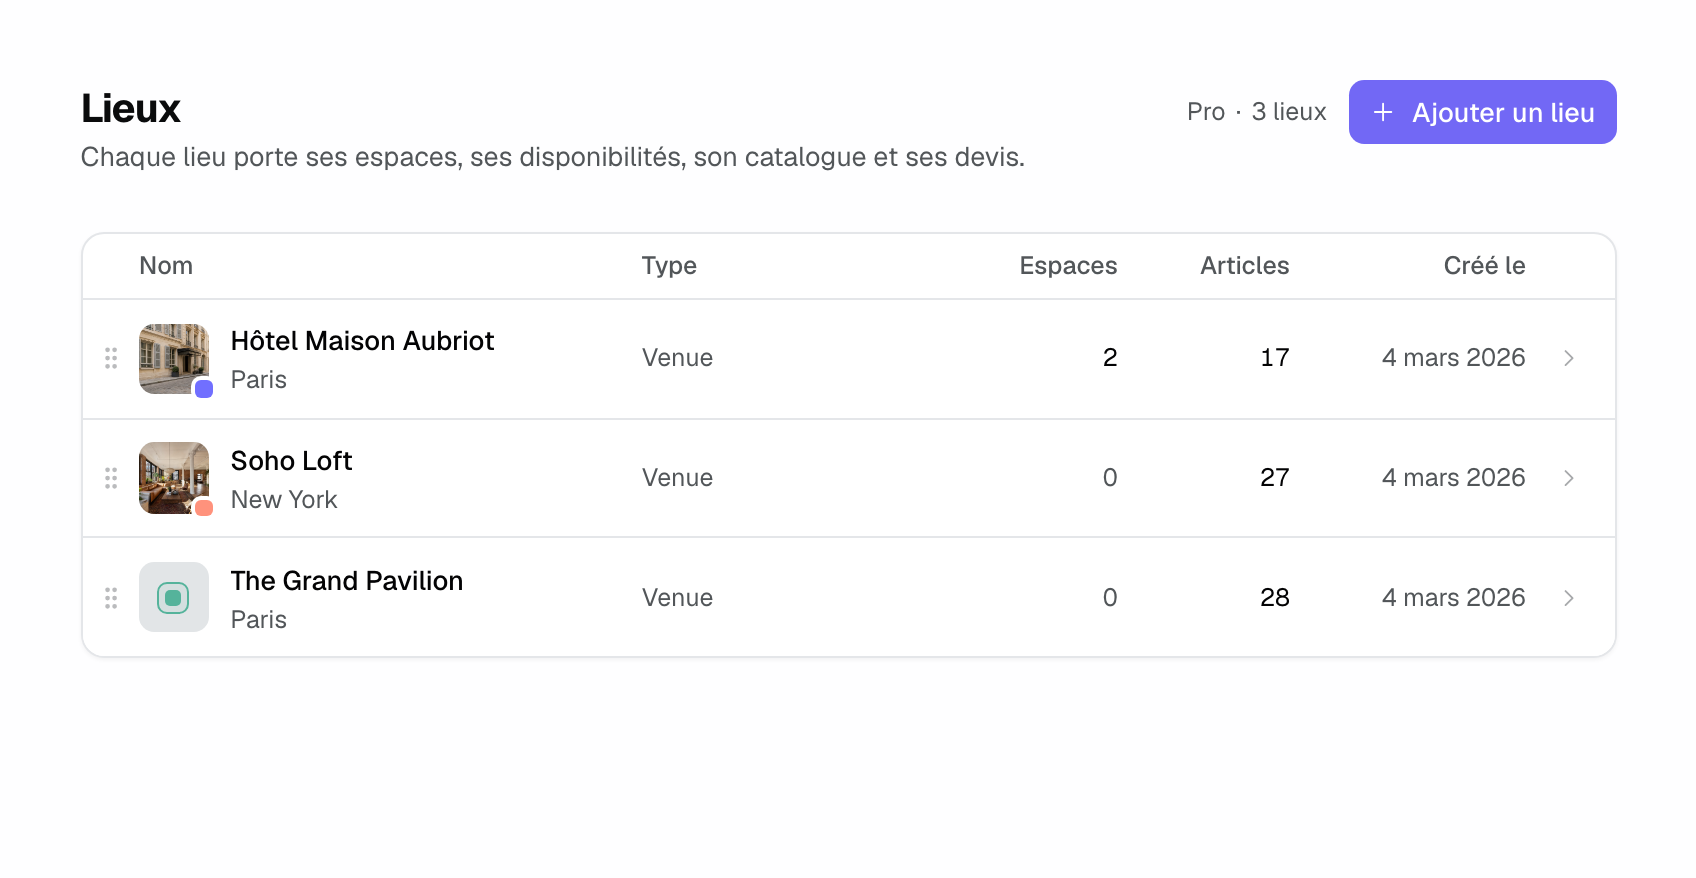
- In the sidebar, "Venues" lists your venues with their color dot. Past 8 venues, the entry only shows how many there are.
- "Settings" > "Venues" shows the venue table: name and city, type, number of spaces and items, creation date. Drag a row by its handle to change the order.
- Click a venue to open its page: one card per section, in three groups, "Venue", "Sales" and "Team & tools". The sidebar switches to venue mode with the same sections.
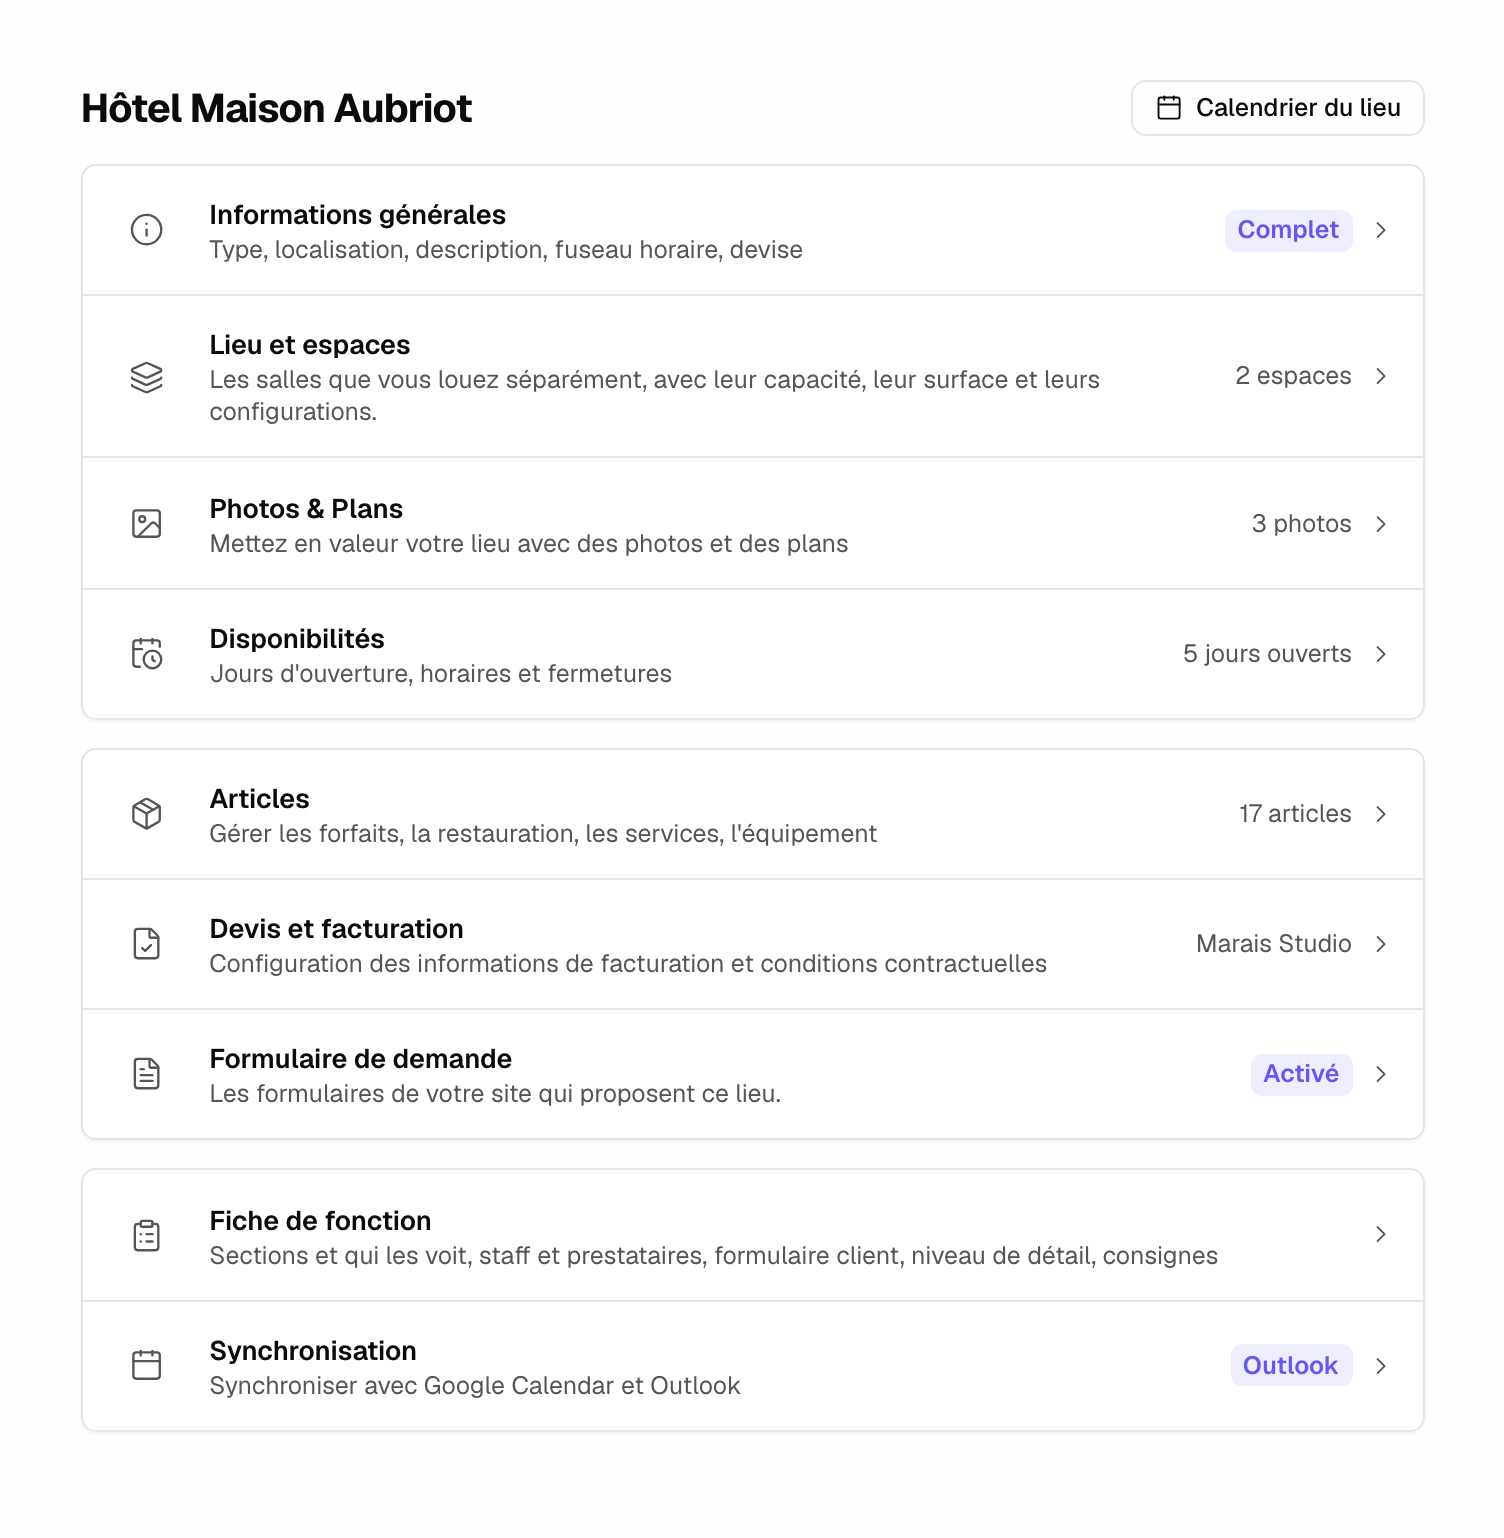
The "Inquiry form" card tells you whether a form on your website offers this venue. The "Venue calendar" button opens the events calendar filtered on this venue.
2. Create a venue
- Open "Settings" > "Venues" and click "New venue". With a single venue, the button sits on your venue's page.
- Enter the "Name" and pick the "Venue color".
- Optional: turn on "Copy settings from existing venue" and pick the venue to copy. Its address, time zone, currency, billing profiles and all its items are copied.
- Confirm. On Pro, the window shows the new venue's price; the difference until the renewal is charged right away, prorated.
Without a copy, a new venue gets the workspace's currency and time zone, and payment, cancellation and postponement terms written in your country's language. Late payment penalties are only on by default for a venue in France. You then adjust everything in the venue.
3. Fill in the general information
Open "General information". Changes are saved automatically, with no button to click. The page has three blocks.
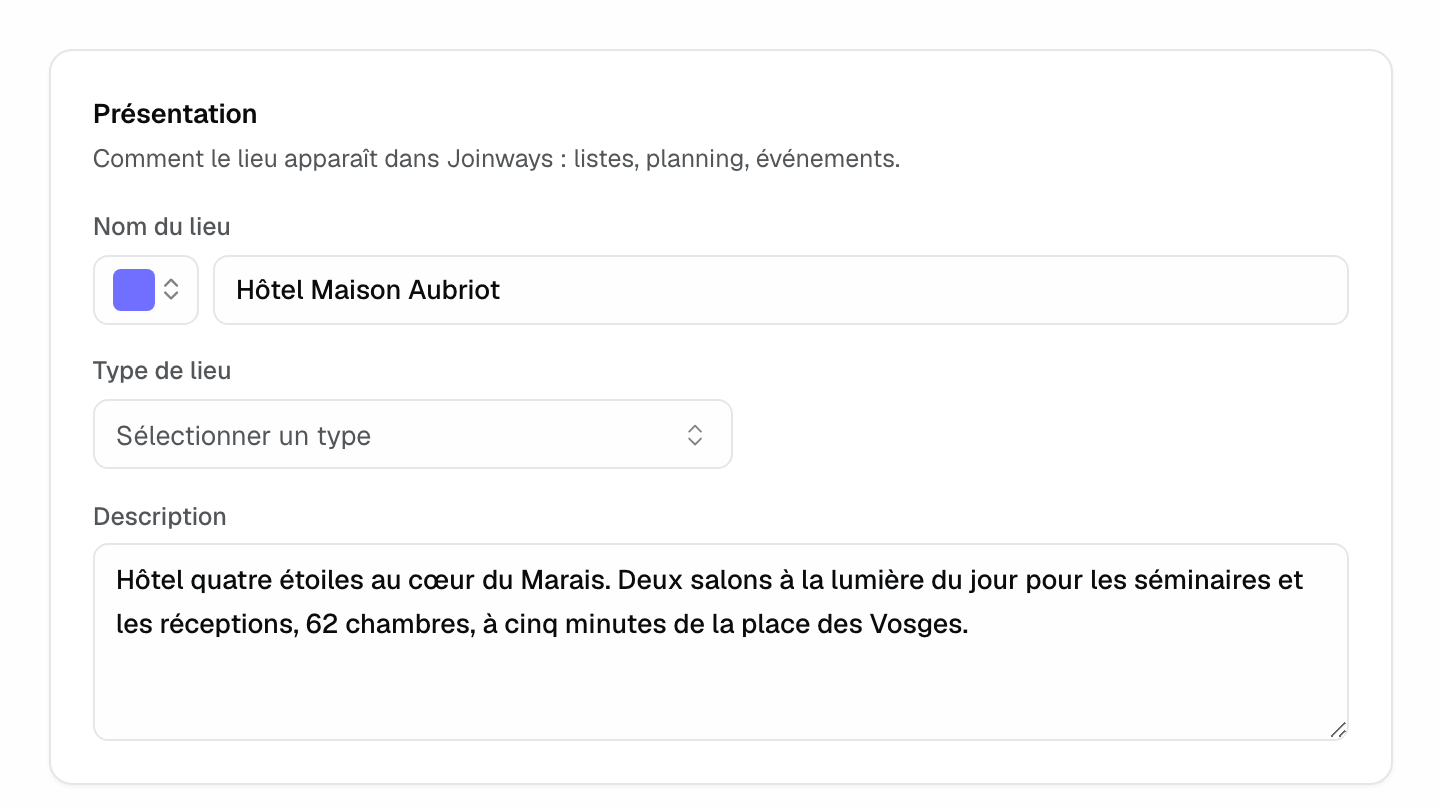
- "Profile": the venue color (the swatch left of the name), the "Venue name", the "Venue type" and the "Description". The color identifies the venue in the sidebar, the calendar and events; it is only set here.
- "Address": type the address and pick a suggestion to fill in the postal code, city and country. In the United States and Canada, a "State" field is added.
- "Preferences": the "Timezone" (local time of the venue's events), the "Currency" of its quotes and invoices, and the "Price display" ("Excluding tax" or "Including tax") in its catalog and quotes. Invoices stay before tax.
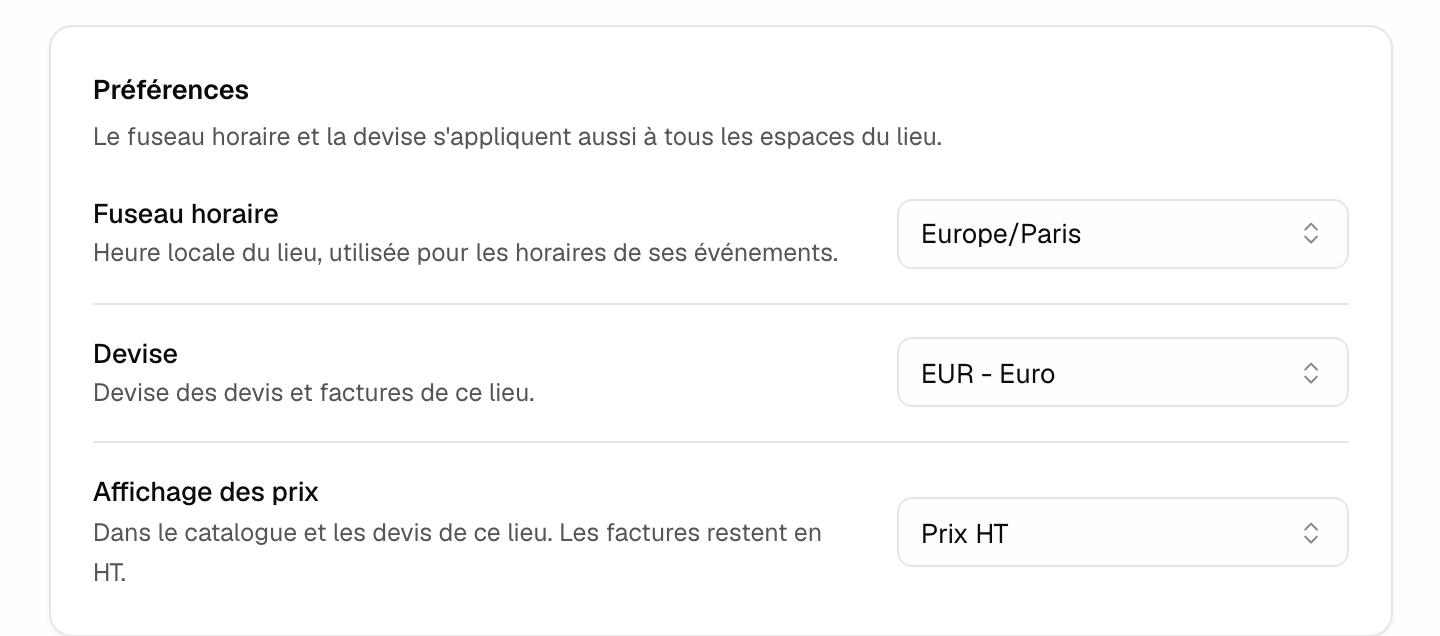
With a single venue, the time zone and currency also apply to your workspace: reminders, notifications and new venues.
Important: the logo on your quotes and invoices belongs to the workspace, not the venue. It is set in "Settings" > "General", "Company Logo".
At the bottom of the page, "Delete venue" deletes it for good. Everything affected is listed before you confirm.
4. Set up the spaces
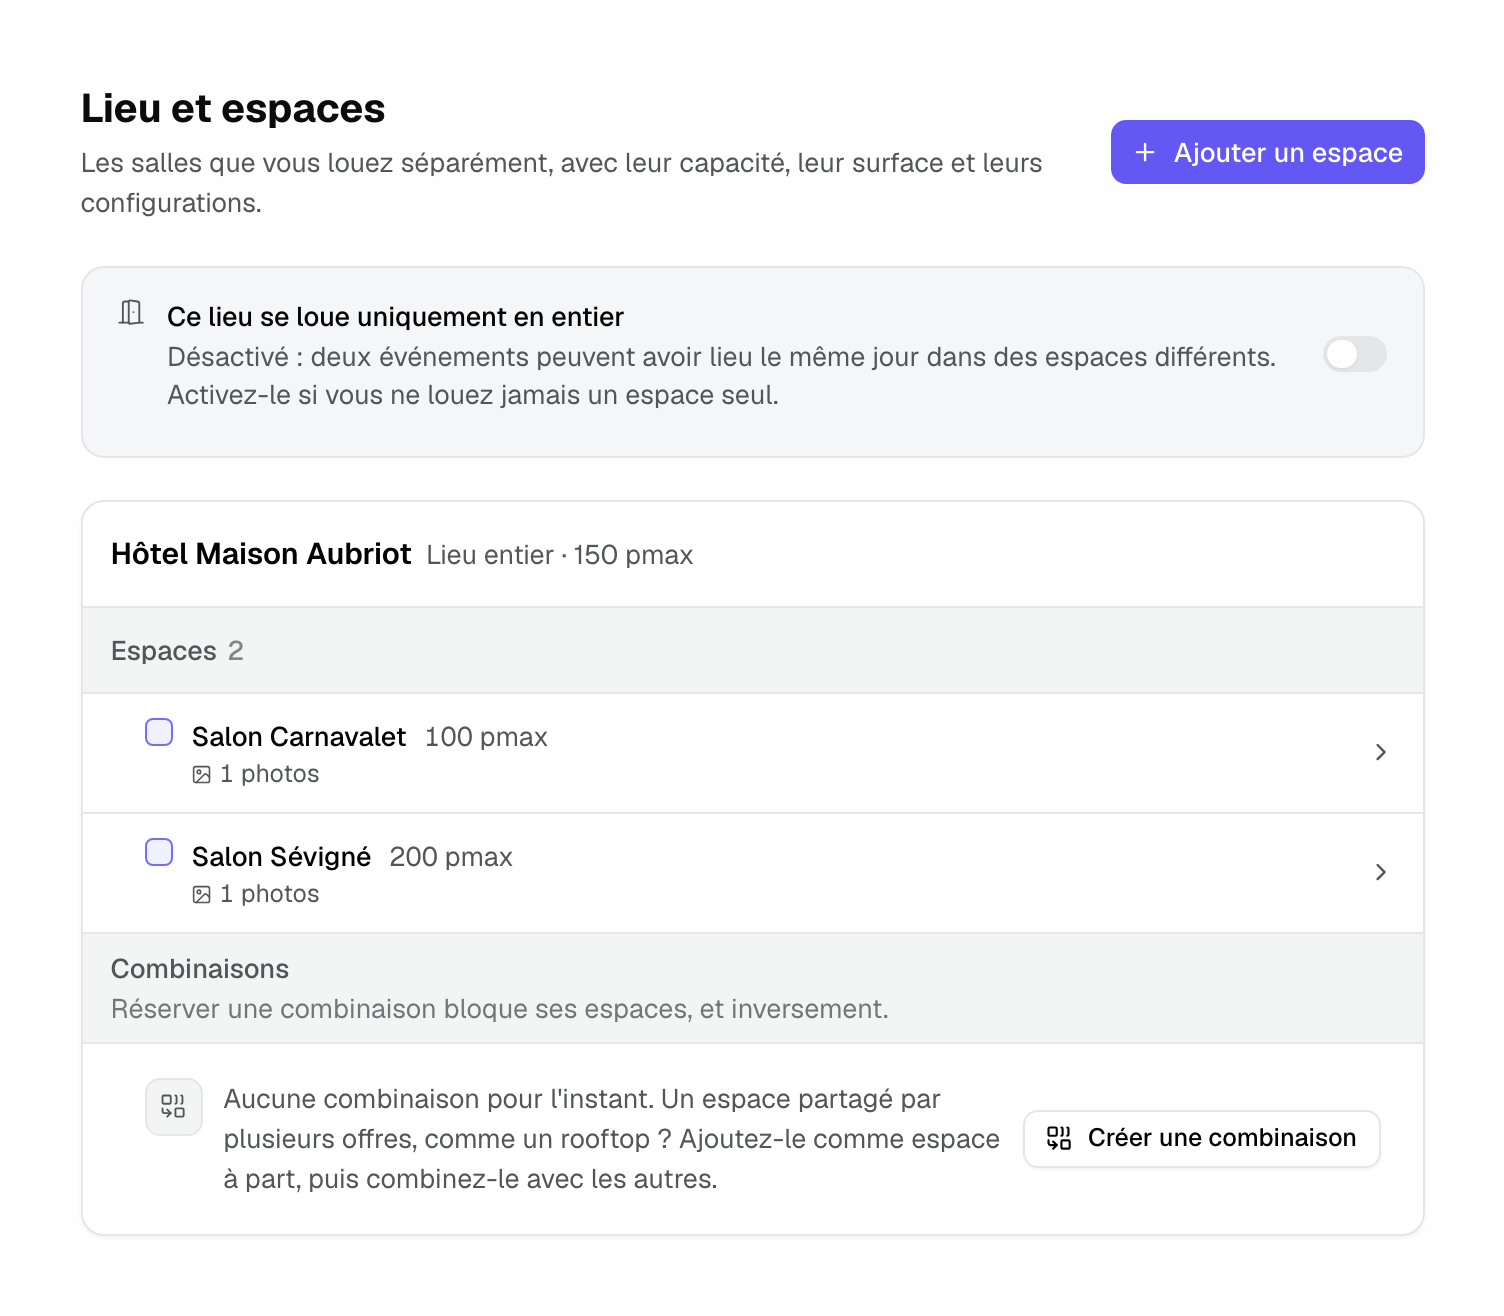
Open "Venue & spaces". A space is a room or area you rent on its own: a lounge, an orangery, a rooftop. The calendar shows one row per space and flags when two events want the same room.
- Click "Add space", give it a clear name and its maximum capacity. You stay on the list to add the next one.
- Open a space to complete its page, in three tabs: "Details" (capacity, surface, layouts, setup, rates), "Photos & Plans" and "Availability". A space takes the venue's hours and closures; you can give it its own hours and extra closures.
- Drag spaces by their handle to set their display order.
Combinations
If two rooms are also rented together, click "Create a combination" and tick the spaces rented together: the name "A + B" fills in by itself. Booking the combination blocks its spaces, and booking one of them blocks the combination. For a space shared by several offers, like a rooftop, add it as a space of its own, then combine it with the others.
Venue rented whole only
Turn on "This venue is only rented whole" if you never rent a space on its own. Every event then blocks the whole venue for its hours, and no space is picked. The venue is billed as a 1-space venue; its spaces still describe your rooms (capacity, surface, photos). Turning the option off counts every space again: if the venue's size changes, Joinways shows the new price and asks you to confirm.
5. Complete the rest of the venue
- "Availability": opening days, hours and closures. See Manage availability and avoid double-bookings.
- "Items": packages, catering, services and equipment, with their prices. "Import from…" copies another venue's items. See Manage your catalog and pricing.
- "Proposals & invoicing": billing identity, financial options, contract terms, contract and client quote, in tabs. With a single venue, everything is edited right on the page, with no profile to name; with several venues, named profiles are shared across venues. See Billing settings.
- "BEO": what the client, staff and vendors see. See Prepare a function sheet (BEO).
- "Synchronization" ("Calendars" in a single venue's menu): Google Calendar and Outlook. See Connect Google Calendar.
6. Choose who sees each venue
Venue access is set in "Settings" > "Teammates", "Venues" column, not in the venue. By default, each teammate sees "All venues", including those created later. Choose "Some venues" to limit them: they are then offered as event owner only on those venues and can only open their settings pages. Owners and admins always see every venue.
There is no per-venue role: what each person can do comes from their workspace role. See Invite and manage your team.
Example: a hotel, then a second site
Hôtel Maison Aubriot, in Paris, rents two lounges: Carnavalet (100 guests) and Sévigné (200). It is the workspace's only venue: the team opens it from "My venue". They create both spaces, then a "Salon Carnavalet + Salon Sévigné" combination for large receptions. Booking the combination blocks both lounges.
A year later, the group opens a villa. The team clicks "New venue" from the hotel's page, copies its settings, then adjusts the rental prices in the villa's "Items". The sidebar now shows "Venues" with both sites, and the salesperson hired for the villa is limited to "Some venues" in "Teammates".
Troubleshooting
I can't find "Venues" in the settings anymore
Cause: your workspace has a single venue. Solution: its sections are listed in the "My venue" settings group, and "My venue" in the sidebar opens its page.
I can't find where to change the quote logo
Cause: the logo belongs to the workspace. Solution: "Settings" > "General", "Company Logo".
A teammate only sees "Items" and "BEO" on a venue
Cause: their role is "Member"; the other sections are reserved for owners and admins. Solution: an admin makes the change, or changes their role in "Teammates".
A teammate can't find a venue
Cause: they are limited to "Some venues". Solution: in "Settings" > "Teammates", "Venues" column, tick this venue or choose "All venues".
"New venue" shows a limit
Cause: the Free plan is limited to 1 active venue. Solution: click "Move to Pro".
Frequently asked questions
Can I manage several venues in one workspace?
Yes, on Pro and during the trial (one venue on Free). Each venue keeps its spaces, items and settings, and is billed by its size.
Do I need to rebuild my catalog for a new venue?
No. Copy it at creation with "Copy settings from existing venue", or later from "Items" with "Import from…". Then adjust the venue's own prices.
Can a space have its own hours and closures?
Yes. In a space's "Availability" tab, customize its hours or add closures. It also keeps the venue's closures.
Does a venue's time zone change the workspace's?
With a single venue, yes: the venue's time zone and currency apply to the whole workspace. With several venues, each venue has its own, and "Settings" > "General" keeps the reminder time zone and the default currency for new venues.
Can I delete a space I no longer rent?
Yes, from its menu in "Venue & spaces". Before you confirm, Joinways lists the events, inquiries, items and combinations that use it. An event left with no space books the whole venue. If the room only changes use, rename it instead.
See also
Provalo sulle tue prossime richieste per 30 giorni, senza carta.