Embed an inquiry form on your website
Create your website form in Joinways, set its fields and look, then paste its code: every submission lands in your Inquiries.
Aggiornato il
Your website is often the front door: a visitor who fills in a form already has a project in mind. But a generic form sends an email you have to retype, forgets to ask for the headcount and says nothing back to the visitor on a Sunday evening.
The Joinways inquiry form creates an inquiry directly in "Inquiries", with each piece of information in its place. It is set at the workspace level: a form offers one or several of your venues, picks its fields, sends an acknowledgement, respects GDPR and takes your website's colors. The preview next to the settings shows the form as the visitor will see it.
What you'll learn
- Create a form and choose the venues it offers.
- Put it on your website, or share its link.
- Set its fields, the acknowledgement, the look and privacy.
- Know what happens to each submission.
Prerequisites
- An owner or admin role in the workspace, and at least one venue created.
- Being able to edit your website (HTML or custom code block), or someone who does it for you.
- An active venue: a venue locked by the Free plan limit does not receive inquiries.
1. Create a form
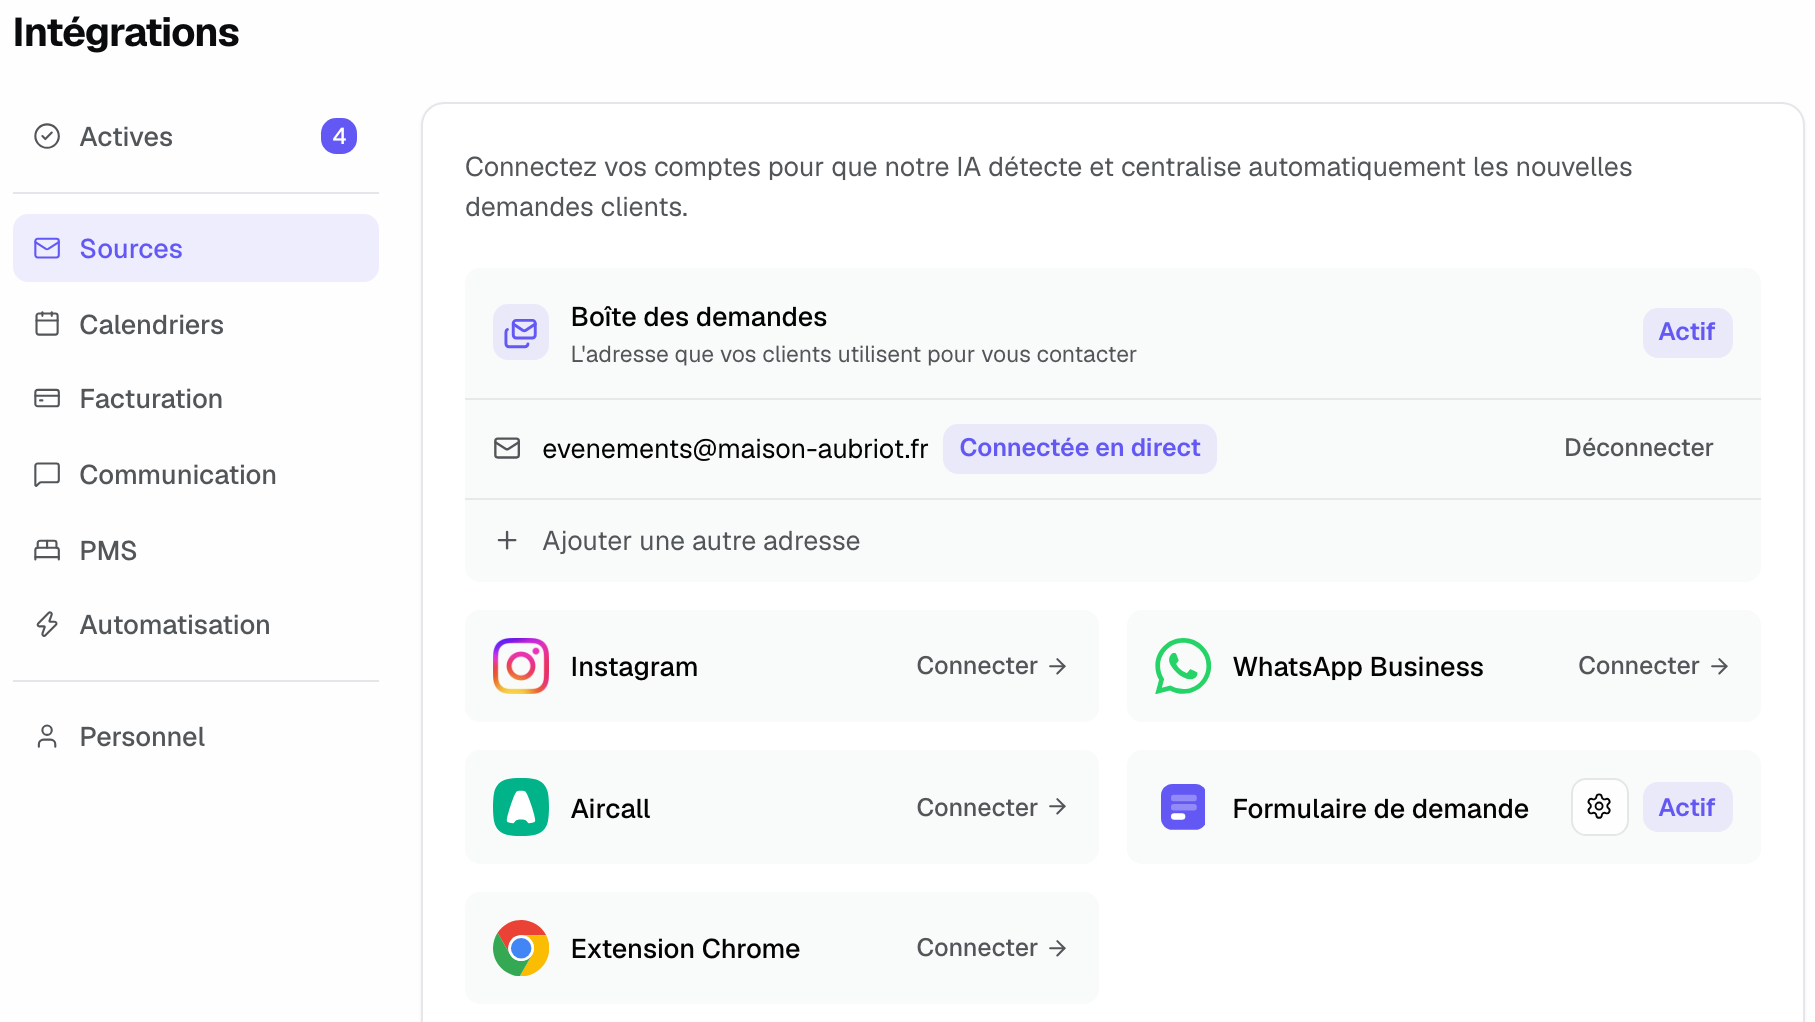
Go to "Settings" > "Integrations", "Sources" tab, and click the "Inquiry form" card. The "Inquiry forms" page lists your forms, each "Online" or "Offline", with the venues it offers.
- Click "Create a form" (or "New form" if you already have one).
- Give it a "Name": it helps you find it in the list, visitors do not see it.
- Tick the "Venues offered". One venue: every inquiry goes there, with no question to the visitor. Several venues: the visitor picks theirs, in the order of your venues (25 at most). The same venue can appear in several forms.
- Check that the banner switch says "Online".
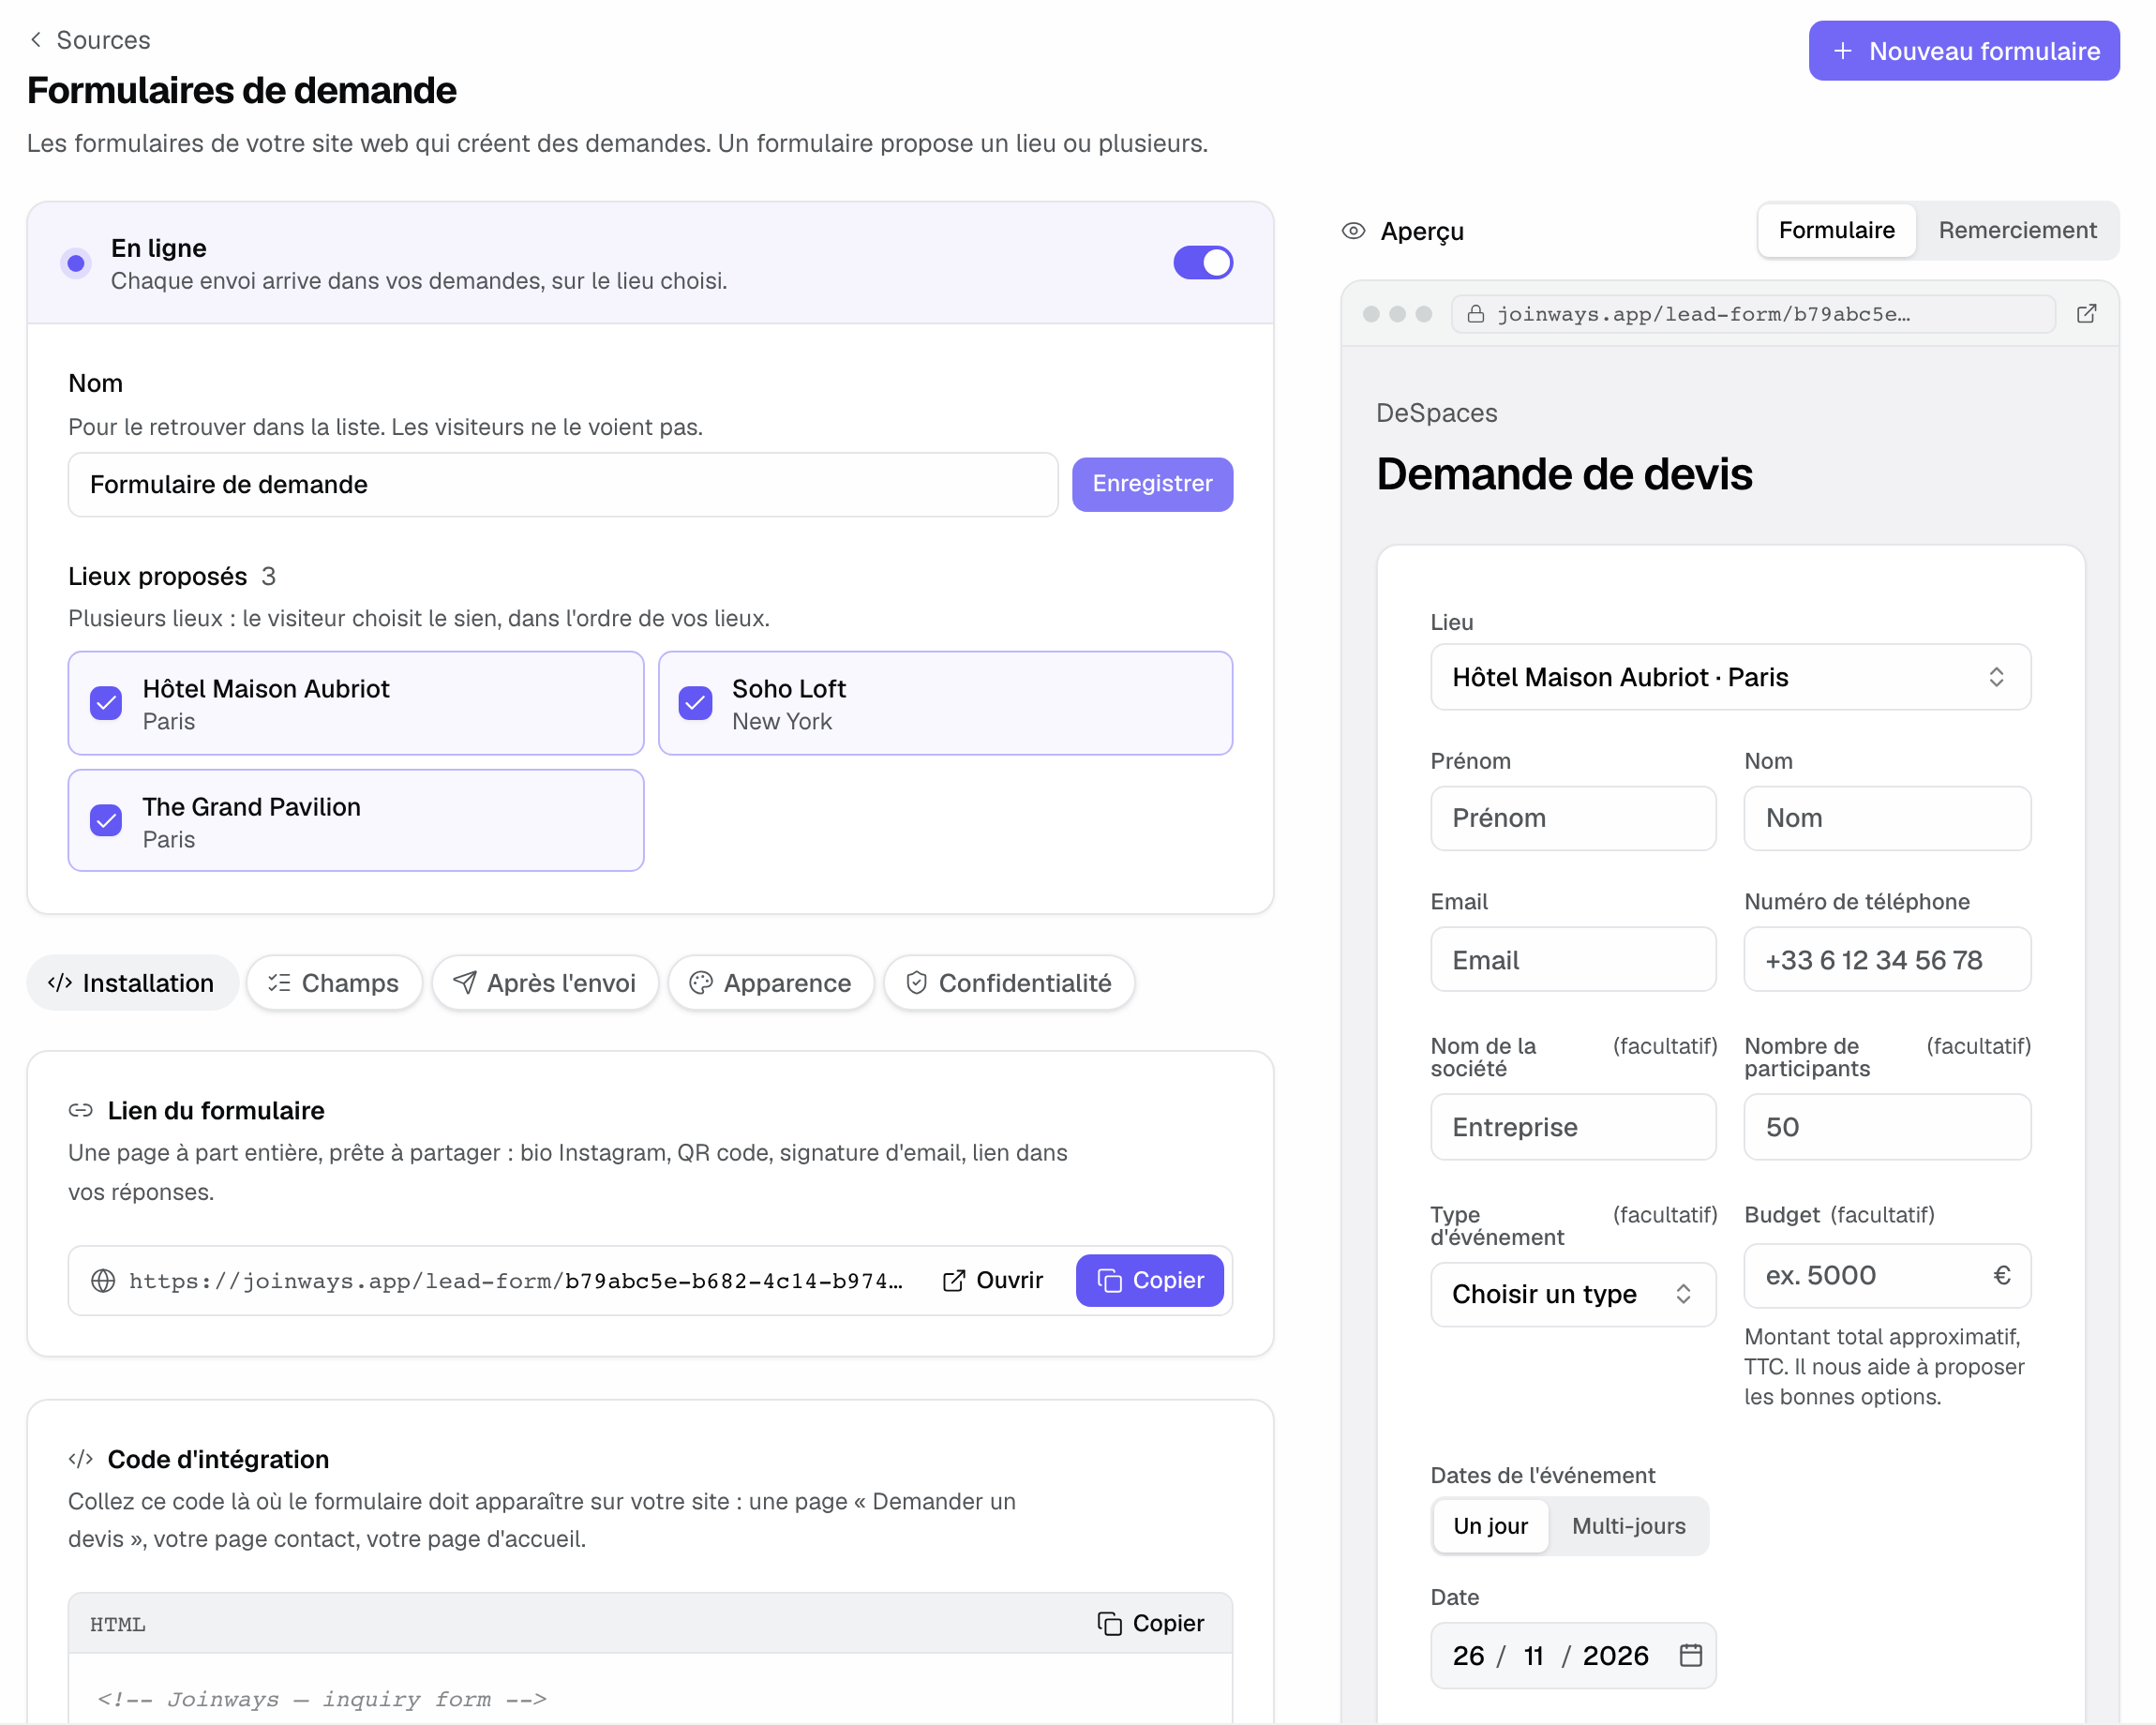
The preview shows your changes even before you save. Nothing is sent from the preview. On a narrow screen, it opens from a "Preview" panel.
2. Install the form
The "Installation" tab offers three ways to publish the form:
- "Form link": a page of its own, ready to share (Instagram bio, QR code, email signature, link in your replies). Copy or open it.
- "Embed code": paste the block where the form should appear ("Request a quote" page, contact page). The form shows up where the div is and adjusts its height by itself. On Webflow, WordPress, Wix, Squarespace or Shopify, use an HTML or custom code block.
- "Code for a venue's page": on a form with several venues, the same form with that venue already chosen. The visitor can change it.
Under the code, "Allowed domains" limits the websites that can use the form (20 at most). When the form is created, Joinways adds the domain of the workspace owner's email address; add others in the form example.com. While the list is empty, any site that copies your code can fill your inbox.
The "Prefill, analytics and events (optional)" section is for advanced sites: attributes on the script tag prefill the form, a browser event and a dataLayer push (joinways_lead_submitted) follow each submission for Google Tag Manager, and a "Direct iframe address" serves page builders that only accept a URL. The page's utm_* parameters and ad click IDs are saved on the inquiry: see The marketing source of inquiries.
3. Choose the fields
In the "Fields" tab, name and email are always asked. For phone, company, headcount, event type, budget and times, choose "Required", "Optional" or "Hidden". The project description is required or optional. A short form converts better, a complete one saves a back-and-forth.
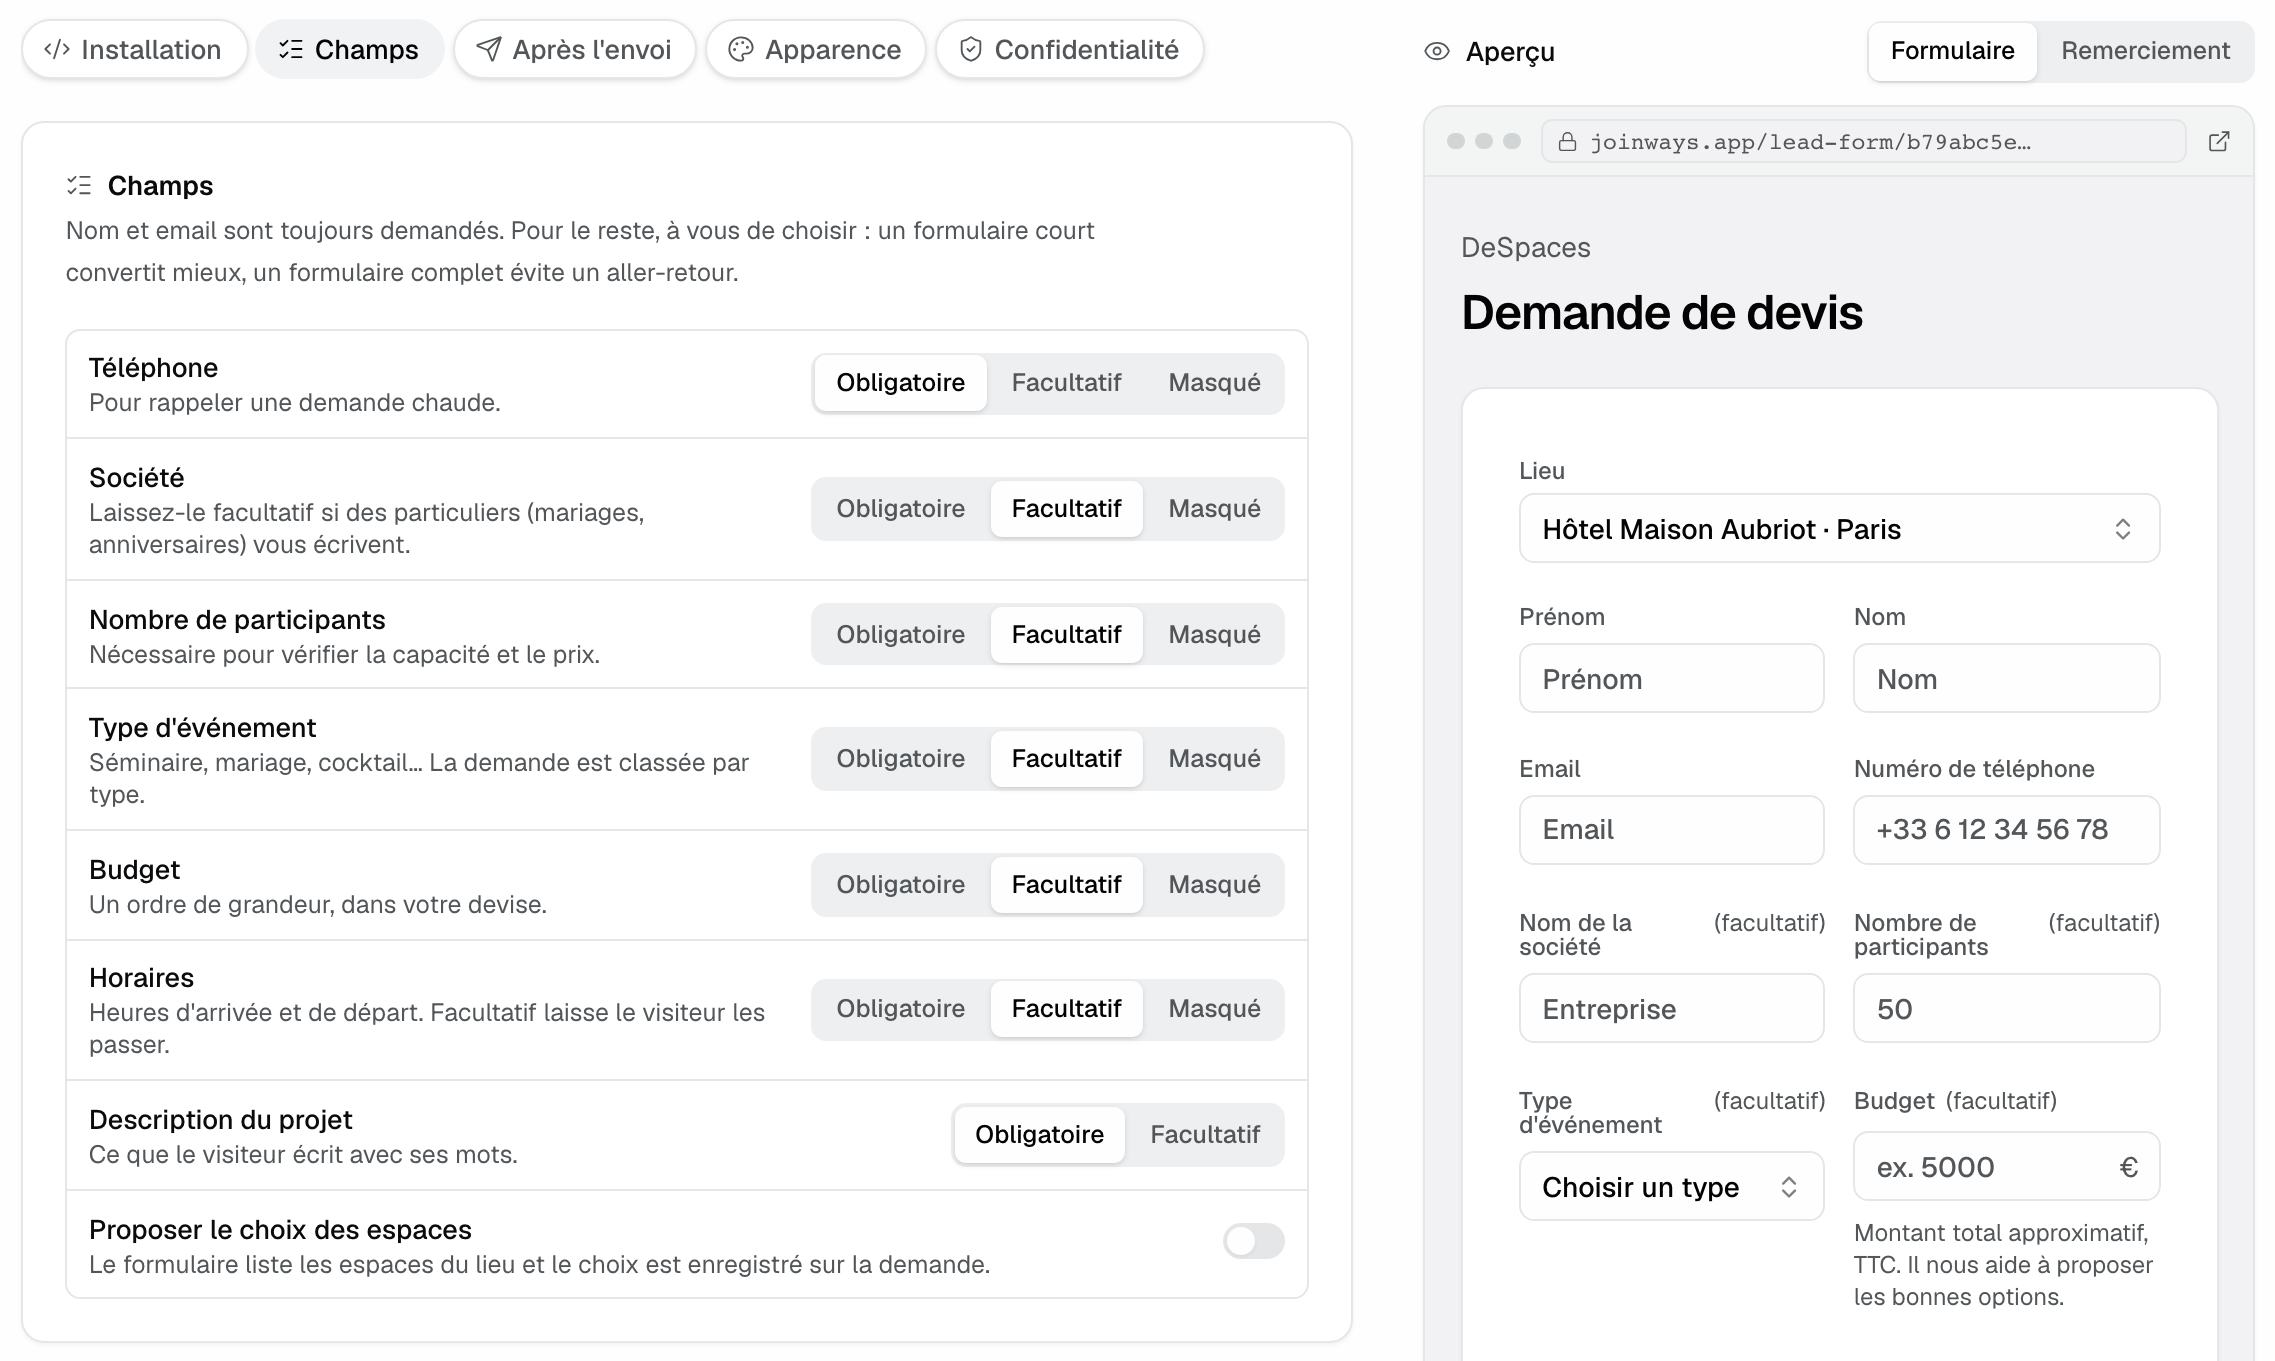
- "Let requesters choose rooms" lists the venue's spaces; the choice is saved on the inquiry. Available once the venue has at least two spaces and is not rented as a whole only.
- "Your own questions": up to 10 questions (short text, long text, choice in a list, yes/no), required or not. The answers appear in the inquiry summary.
- "Availability": with "Show an availability hint", the visitor sees that the dates seem taken when that is the case, without any event name. They can still send the inquiry.
4. Set what happens after sending
The "After sending" tab sets what the visitor receives and sees.
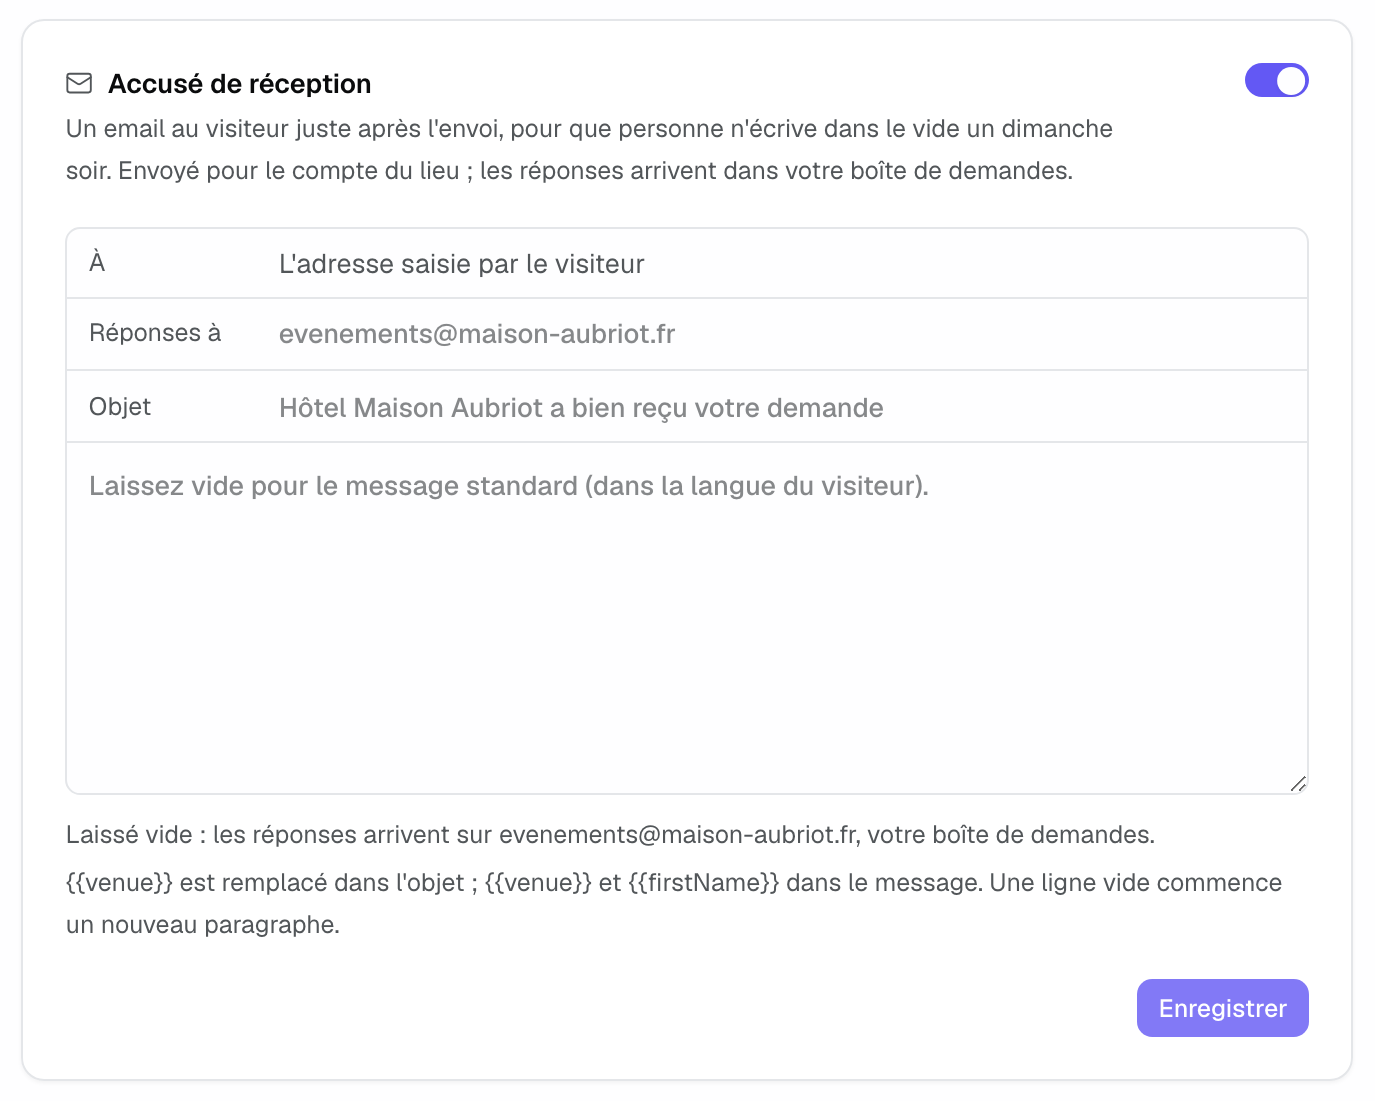
- "Acknowledgement": with "Send an acknowledgement", an email goes to the visitor right after they submit, on behalf of the venue. Their replies reach your inquiries mailbox, or the address set in "Replies go to". Subject and message can be edited ({{venue}} and {{firstName}} are replaced); left empty, the standard message goes out in the visitor's language.
- "Thank-you and redirect": the title and message shown after sending, or a "Redirect after sending" to a page of your website, useful to track the conversion in your analytics.
5. Match the look to your website
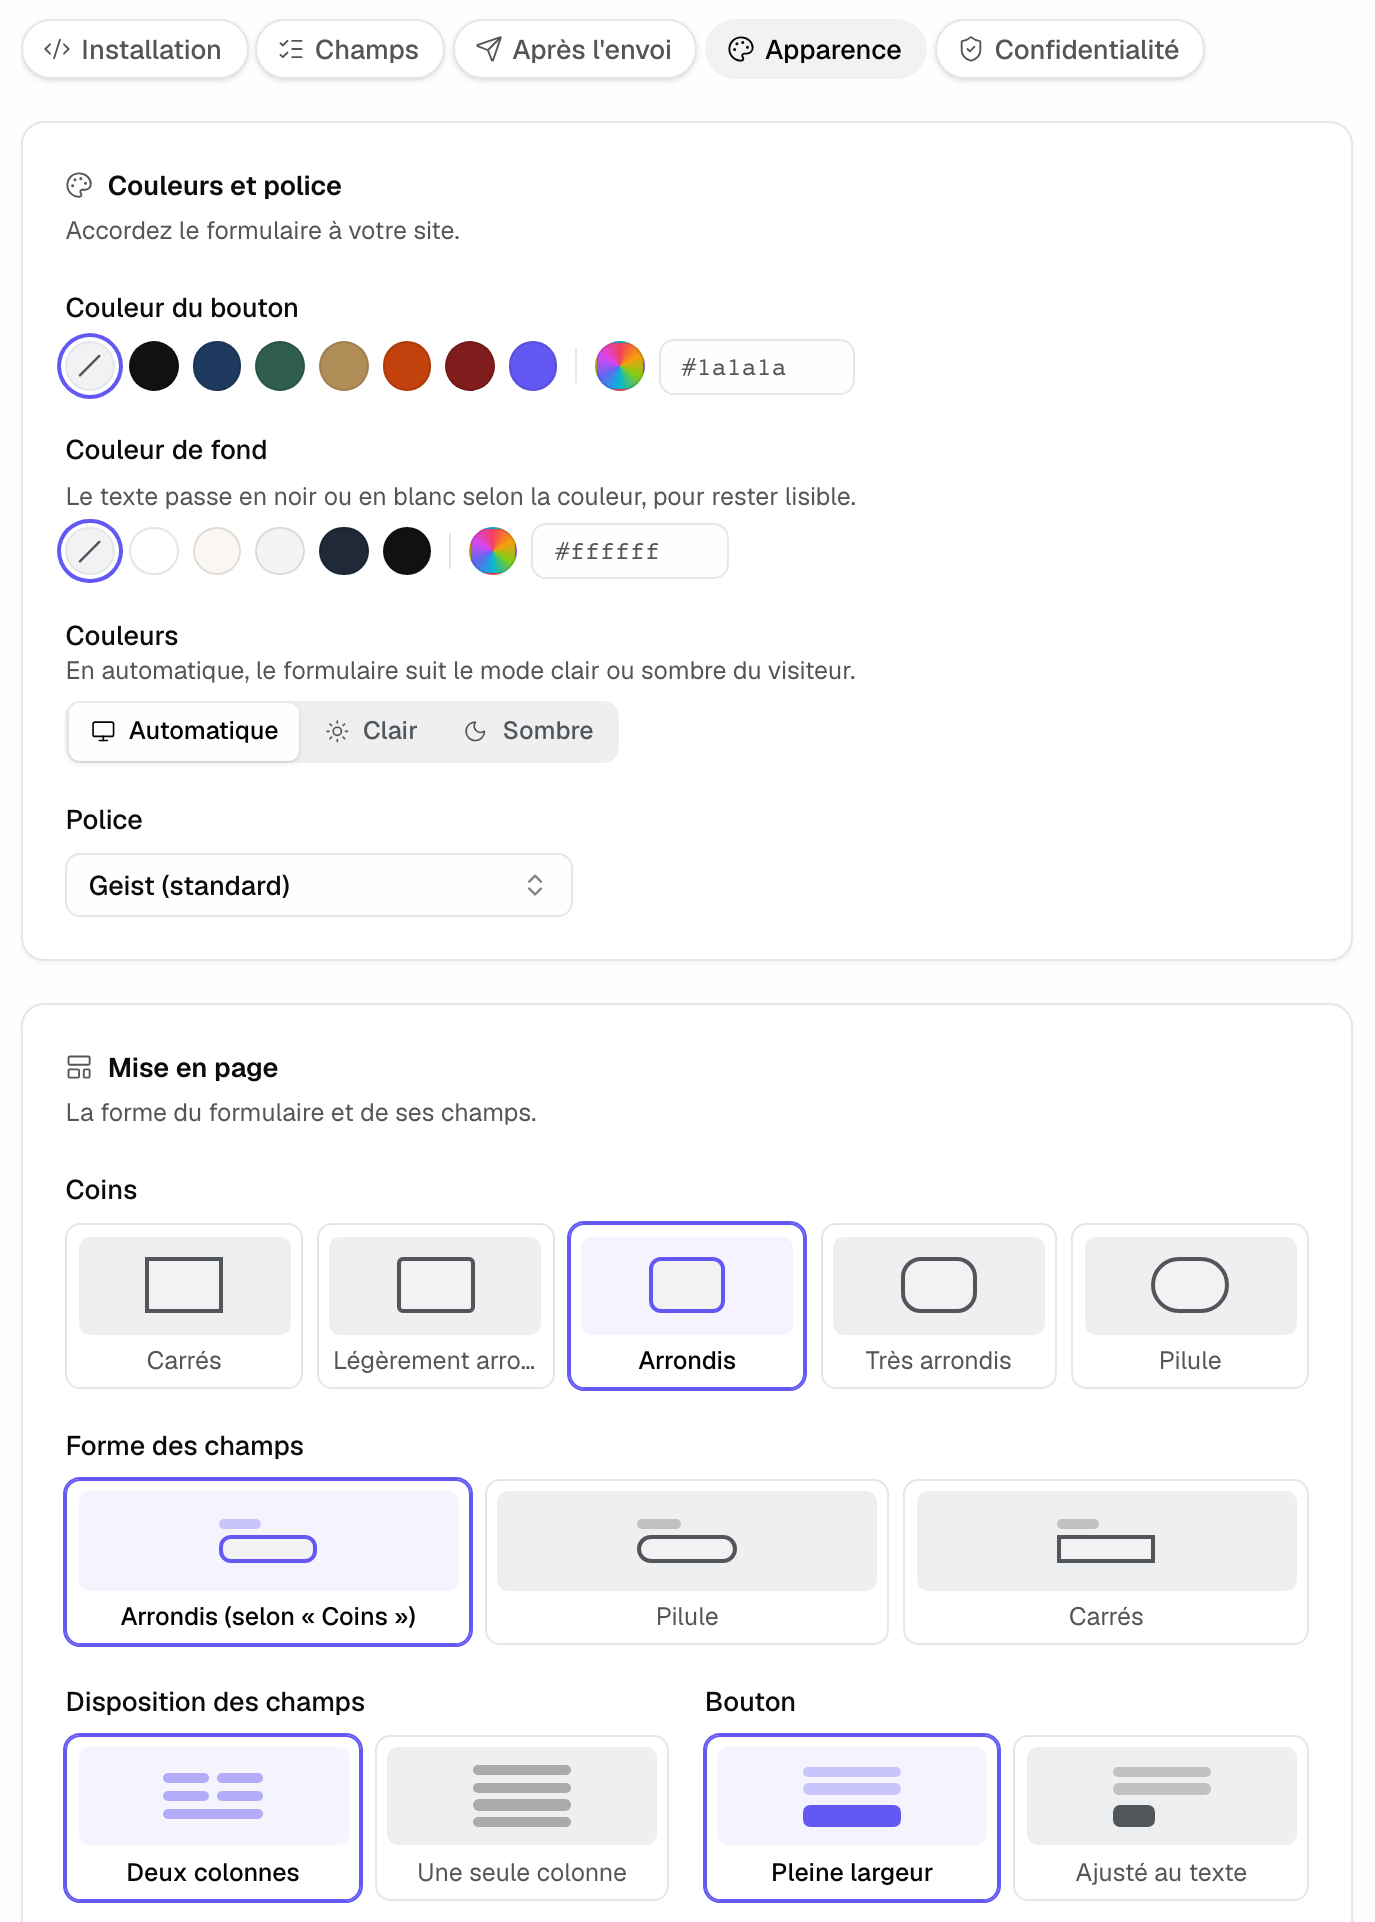
The "Appearance" tab is set with swatches and drawings:
- "Colors and font": "Button color", "Background color" (text switches to black or white to stay readable), "Colors" automatic, light or dark, and "Typeface" (Geist, system serif or a Google Font).
- "Layout": "Corners", "Field shape", "Field layout" (two columns or one), "Button" (full width or fitted to the text), title alignment, and "No card around the form" to place the fields straight on your page.
- "Texts": title, introduction and button text, plus the "Language" (automatic from the visitor's browser, or forced to French, English or Spanish).
Below the form, the line "Form powered by Joinways" is shown.
6. Privacy (GDPR)
In the "Privacy" tab, add the "Privacy policy link" and adjust the "Consent sentence". "Require the consent box" is recommended; when off, a simple notice replaces the box.
Remember to click save in each card you change: unsaved changes survive switching tabs, but not closing the page.
What happens to a submission
Each submission creates an inquiry in "Inquiries", for the chosen venue, with the "Website" source: contact details, company, dates and times, headcount, type, budget, chosen spaces, answers to your questions and description, already sorted. You handle it like the others (see Process an incoming inquiry). The form is protected against automated submissions and limits repeated submissions from the same connection.
Example: a group of three venues
A group runs a hotel and two event spaces in Paris. It creates a single form offering all three venues, places it on the "Private hire" page of its website, and pastes the "Code for a venue's page" on each space's page. The acknowledgement reassures the Sunday-evening visitor, the availability hint spares them a date already taken, and on Monday morning each inquiry is already on the right venue.
Troubleshooting
The form does not show on my page
Cause: the div from the embed code is missing, or the page was not republished. Solution: paste the full block again where you want it and republish.
Submissions are refused
Cause: the form is "Offline", or the website's domain is not in "Allowed domains". Solution: put it back online and add the domain, without www.
The form shows nothing
Cause: none of the ticked venues can receive inquiries (venue locked on the Free plan). Solution: tick an active venue in "Venues offered".
The visitor does not receive an acknowledgement
Cause: "Send an acknowledgement" is off, or the setting was not saved. Solution: switch it on in "After sending" and save.
Frequently asked questions
Do I need one form per venue?
No. A form can offer several venues, and the visitor picks theirs. Only create several forms if your websites differ (one site per venue, for example).
What happened to the form I had set up on a venue?
It became a workspace form: the code already pasted on your website keeps working. The venue page shows which forms offer it.
What happens if I take the form offline?
Its link and code no longer take inquiries, and work again as they are once it is back online. "Delete this form" stops them for good; inquiries already received stay.
Does the form work on phones?
Yes. It adapts to the page width and adjusts its height by itself.
See also
Provalo sulle tue prossime richieste per 30 giorni, senza carta.